Building Power: How To Make Your Own Lifepo4 Battery Pack

Are you tired of relying on off-the-shelf battery packs to power your project? If so, it's time to take matters into your own hands and learn how to make your own LiFePO4 Battery Pack. With the right materials and knowledge, constructing a customized battery pack can be done with relative ease. As an electrical engineer specializing in battery packs, I'm here to help guide you through the process so that you too have full control overpowering your projects.
The first step is understanding exactly what goes into making a LiFePO4 Battery Pack. This article will cover everything from selecting the correct components such as cells and BMS boards, wiring them together properly for maximum efficiency, and finally assembling the whole unit for use. Additionally, we'll discuss some best practices to ensure safety when building these powerful units.
With this information at hand, anyone who desires more control over their projects should feel empowered to build their own custom LiFePO4 Battery Pack! The result will be a reliable source of energy available whenever needed. So let’s get started and don't forget to keep safety top of mind throughout the entire process!
Definition Of A Lifepo4 Battery Pack
A LiFePO4 battery pack is a type of lithium-ion (Li-Ion) rechargeable battery that uses advanced lifepo4 technology. It consists of several cells connected together in series and/or parallel, depending on the desired voltage or capacity output. This allows for an efficient means to store power and discharge it when needed. The chemistry of this battery contains lightweight graphite anodes, which are surrounded by electrolytes consisting mainly of phosphate compounds hence its name 'Lithium Iron Phosphate'.
Due to its unique combination of materials, a LiFePO4 battery has superior cycling performance compared to other types of Li-Ion batteries; meaning it can hold more charge capacity over time before needing replacement. Also due to their stable chemical composition, these packs have very low self-discharge rates so they remain ready to use even after long periods without charging. Additionally, they offer high safety ratings with no risk of thermal runaway if used correctly. With all these advantages, it's easy to understand why many people choose this type of battery pack for their energy storage needs.
Owning your own LiFePO4 battery pack gives you control over your energy source and offers reliable backup power during times when you may need it most. Whether you're powering a home device such as a laptop or phone charger or using them for larger-scale applications such as solar systems and electric vehicles - knowing how to build your own custom pack will give you greater freedom over your electricity supply and help ensure a secure future for yourself and those around you.
Safety Considerations

Safety must always be a priority when creating your own LiFePO4 battery pack. It is important to take the necessary safety measures, such as wearing protective gear and having venting systems in place for any potential gases or vapors that could be released during the charging or discharging of the cells. Additionally, it is essential to have short circuit protection built into the batteries to prevent over-discharge and overheating. Temperature regulation should also be implemented to ensure that no cell reaches too high of a temperature while being charged.
Furthermore, it is important to make sure each individual cell has its own independent circuitry so they can all act independently from one another. This can help protect against any current imbalances between them caused by an external source like a power supply. Finally, understanding how much voltage and amperage the cells need at different points throughout the charge cycle will allow you to make sure you are using the optimal settings for maximum efficiency and lifespan of your LiFePO4 battery pack.
Necessary Equipment And Materials
Now that we have discussed safety considerations, it's time to get into the nitty-gritty of what you need in order to build your own LiFePO4 battery pack. You'll require a few essential pieces of equipment and materials if you want to be successful in this endeavor.
First off, you'll need some LiFePO4 cells. These are the building blocks for your battery pack; they provide storage capacity and release energy when needed. Depending on how much power you want your battery pack to generate, you'll need anywhere from 1-6 cells connected together in series or parallel (or both!). Make sure you choose quality cells with enough voltage output for your project.

Next up, you'll need something to house these cells and keep them safe & secure—this is where a battery shell comes into play. Battery shells come in all shapes and sizes, so make sure you select one appropriate for the number of cells being used. Additionally, consider finding one with built-in protection features such as overcharge/over-discharge protection.
Finally, there are other smaller items needed like a soldering iron and terminal connectors for connecting the cells together securely along with a BMS board for added measures of safety and control over the system’s performance. All of these items can be found online easily at reasonable prices just remember to do research ahead of time before making any purchases!
Preparation Steps
Creating a LiFePO4 battery pack is not as difficult as it may seem. Before diving into the project, there are some important preparation steps to consider for the best results and safety precautions.

First, you should choose an appropriate cell selection that meets your power requirements and size constraints. If you don’t have enough knowledge of battery technology or chemistry, it would be wise to contact a professional who can assist in selecting the right cells.
Once you've chosen your cells, the next step is wiring them together properly. This requires using two different techniques: Battery parallel and series wiring. Parallel wiring increases current capacity while series wiring increases the voltage capability of the entire pack. It's essential to use proper electrical connection methods such as soldering or crimping when connecting wires between batteries. Additionally, protective measures like fuses need to be taken into consideration before powering up the system.
Building a LiFePO4 battery pack comes with many rewards along with risks if done improperly. Make sure to take all necessary preparation steps so that you achieve success in creating a powerful and safe battery pack!
Wiring The Cells In Series
Many people are intimidated by the prospect of wiring cells in series, but it doesn't need to be so hard. With a few simple tools and some basic knowledge, anyone can wire their own LiFePO4 battery pack with confidence.
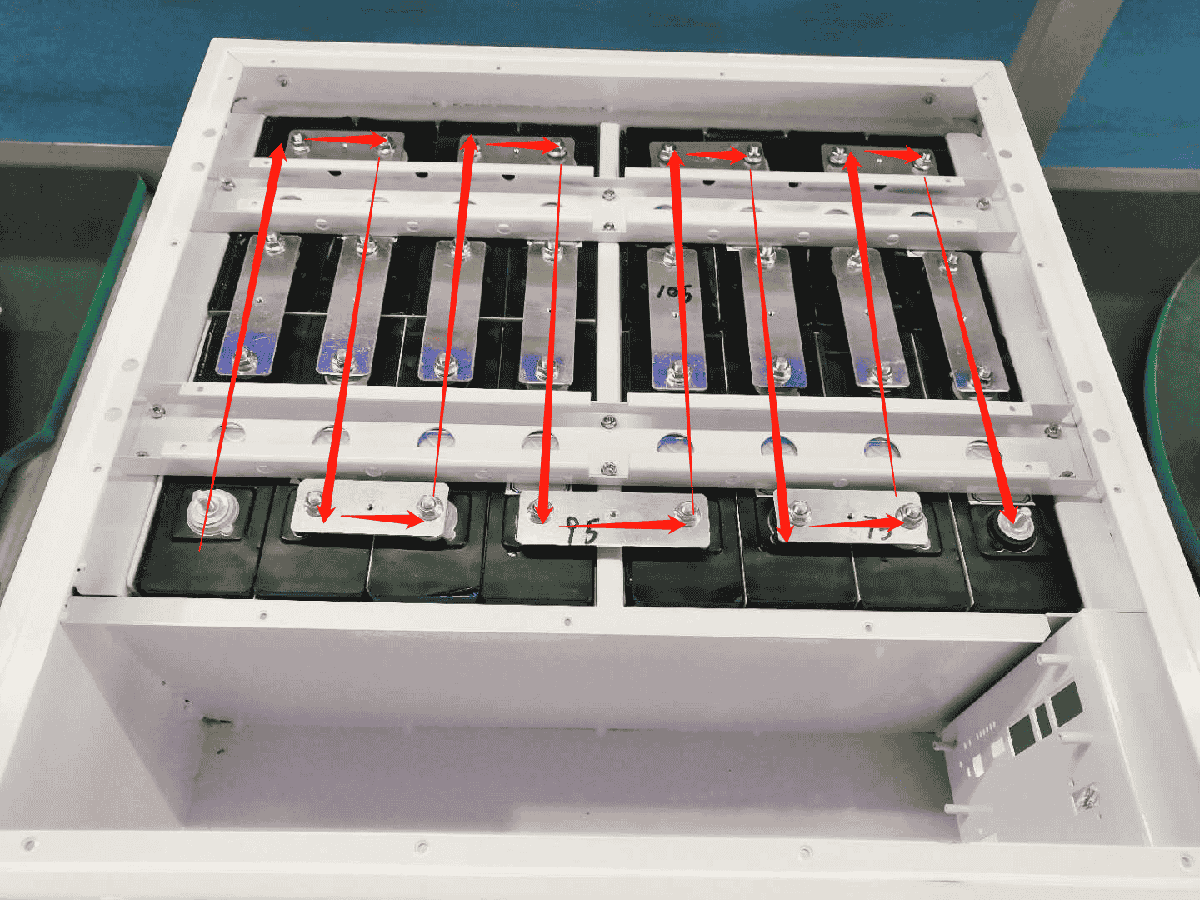
The first step is understanding how series cell connections work. Each cell has two terminals (positive and negative) which must be connected together in order to create a continuous circuit. When multiple cells are connected in this way, they form what's known as a "series". The voltage of each individual cell will add up to give you an overall higher voltage for your battery pack. To do this properly, make sure that all positive terminals are connected together and all negative terminals are connected together never mix them up!

Once you have the correct wiring diagram for your particular application, connecting cells in series is relatively straightforward. Start by soldering wires between each pair of adjacent cells, making sure that the polarity is correct at each connection point. Once everything is wired correctly, use electrical tape or heat shrink tubing to cover any exposed connections for safety reasons. If necessary, use a multimeter to check the continuity between each pair of cells before sealing everything up.
Wiring LiFePO4 batteries in series may seem intimidating at first glance, but follow these steps and you'll soon find out just how easy it really is! Armed with just a few tools and some general knowledge about electricity and circuitry, anyone can build their own powerful LiFePO4 battery pack without breaking a sweat.
Connecting The Battery Management System (BMS)
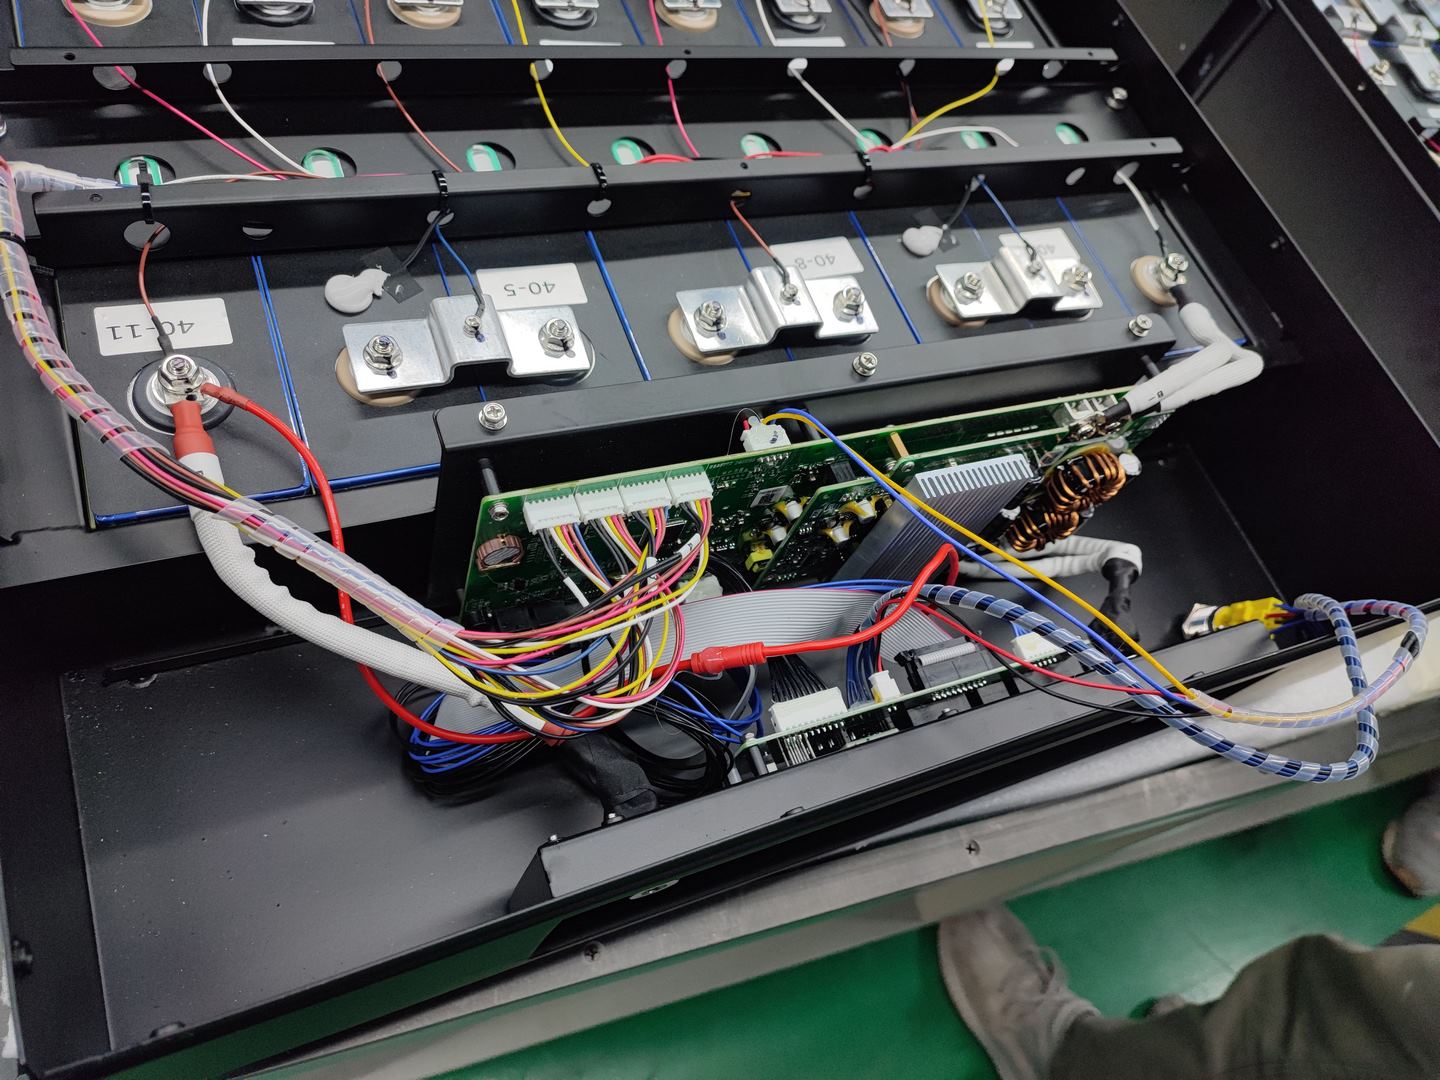
Now that we have taken care of wiring the cells in series, it's time to move on to connecting the Battery Management System (BMS). This is a critical step for building a safe and reliable lifepo4 battery pack. The BMS monitors the state of charge of each cell and protects them from overcharging or discharging too much. It also balances all the cells so they all stay at an equal voltage level, which helps maintain overall performance.
Connecting a BMS can be tricky because you'll need to make sure every connection is made correctly. Start by following the manufacturer’s instructions for your specific model of BMS, as these will provide detailed information about how to wire it up properly. Be sure to double-check everything before powering it up! If something isn't wired right, you could damage both your batteries and your BMS board.

Once the BMS is connected, test it out with a multimeter or other testing device to ensure that it's working properly before using it with your battery pack. Remember: safety first! Taking this extra precaution now will help prevent any potential issues down the line.
In summary, connect the Battery Management System (BMS) carefully according to manufacturer instructions and then use a testing device to verify its proper functioning prior to use - doing so will guarantee a safe and efficient lifepo4 battery pack build!
Installing The Cells Into The Pack Shell
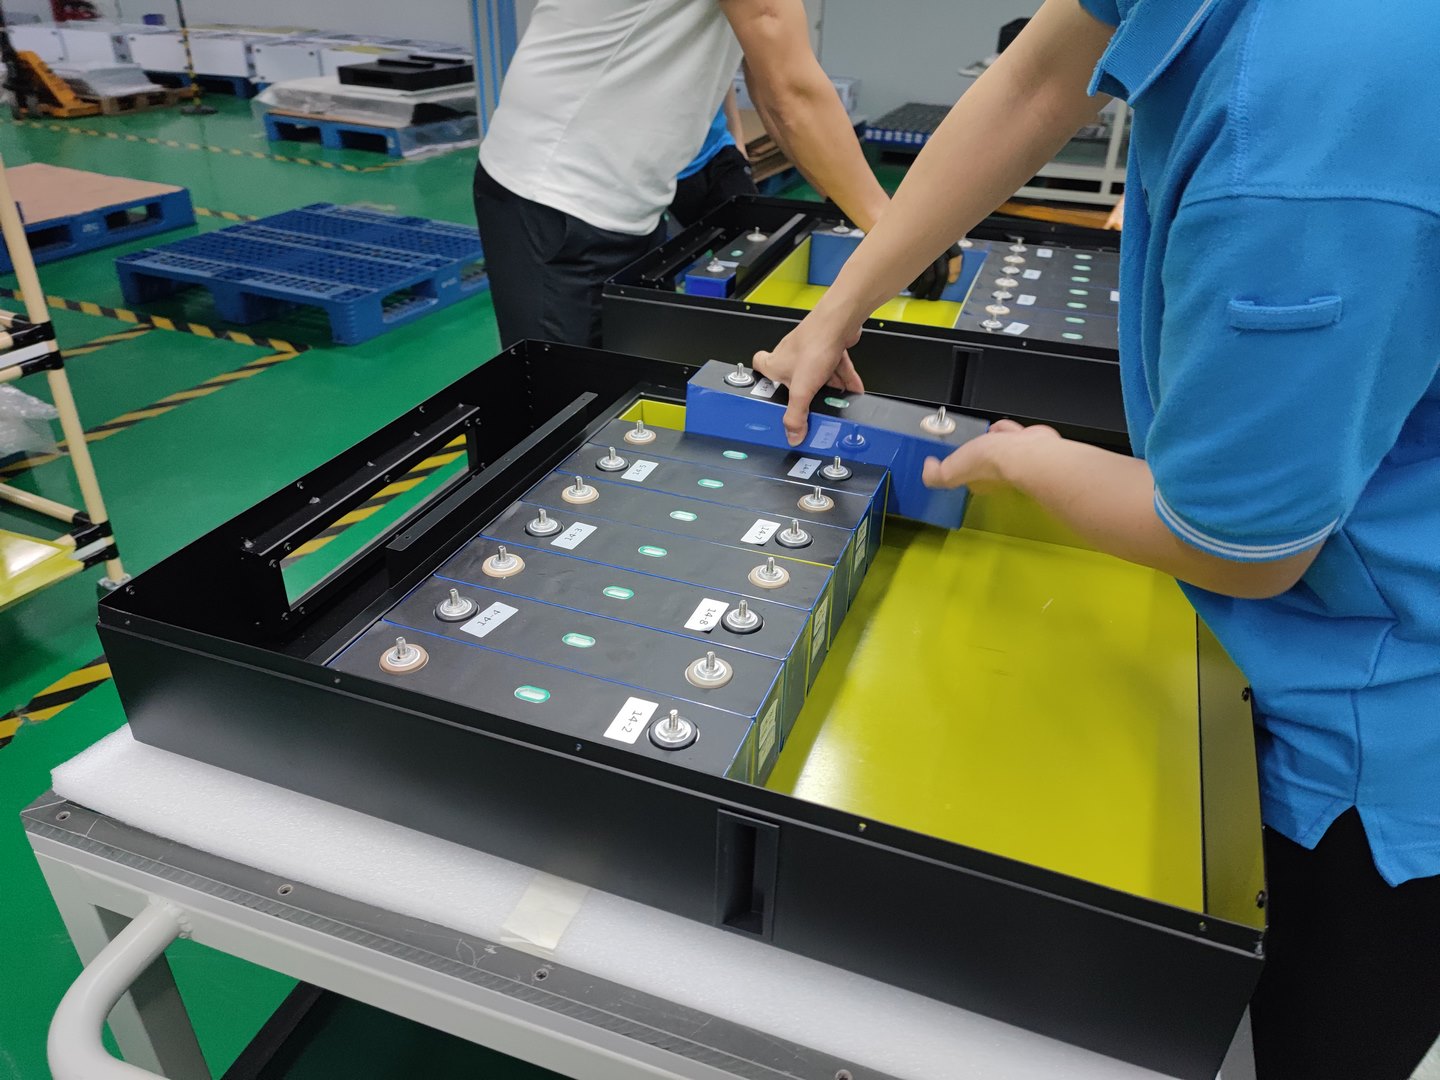
With a few basic components, you can make your own Lifepo4 battery pack for power storage. Installing the cells into the pack shell is an essential step in this process. Here's how to do it:
- Gather all of the necessary supplies, including soldering terminals and wires that are compatible with the cells being installed.
- Mark out the position of each cell within the pack shell, taking care to ensure they have adequate space between them and will fit securely when placed inside.
- Connect each cell’s positive terminal to its negative counterpart by either welding or soldering them together. Make sure to solder firmly so there is no risk of short circuits occurring during use.
- Place all of the connected cells into the pack shell and secure them in place with zip ties or adhesive tape to prevent any movement while charging or discharging energy from the battery pack.
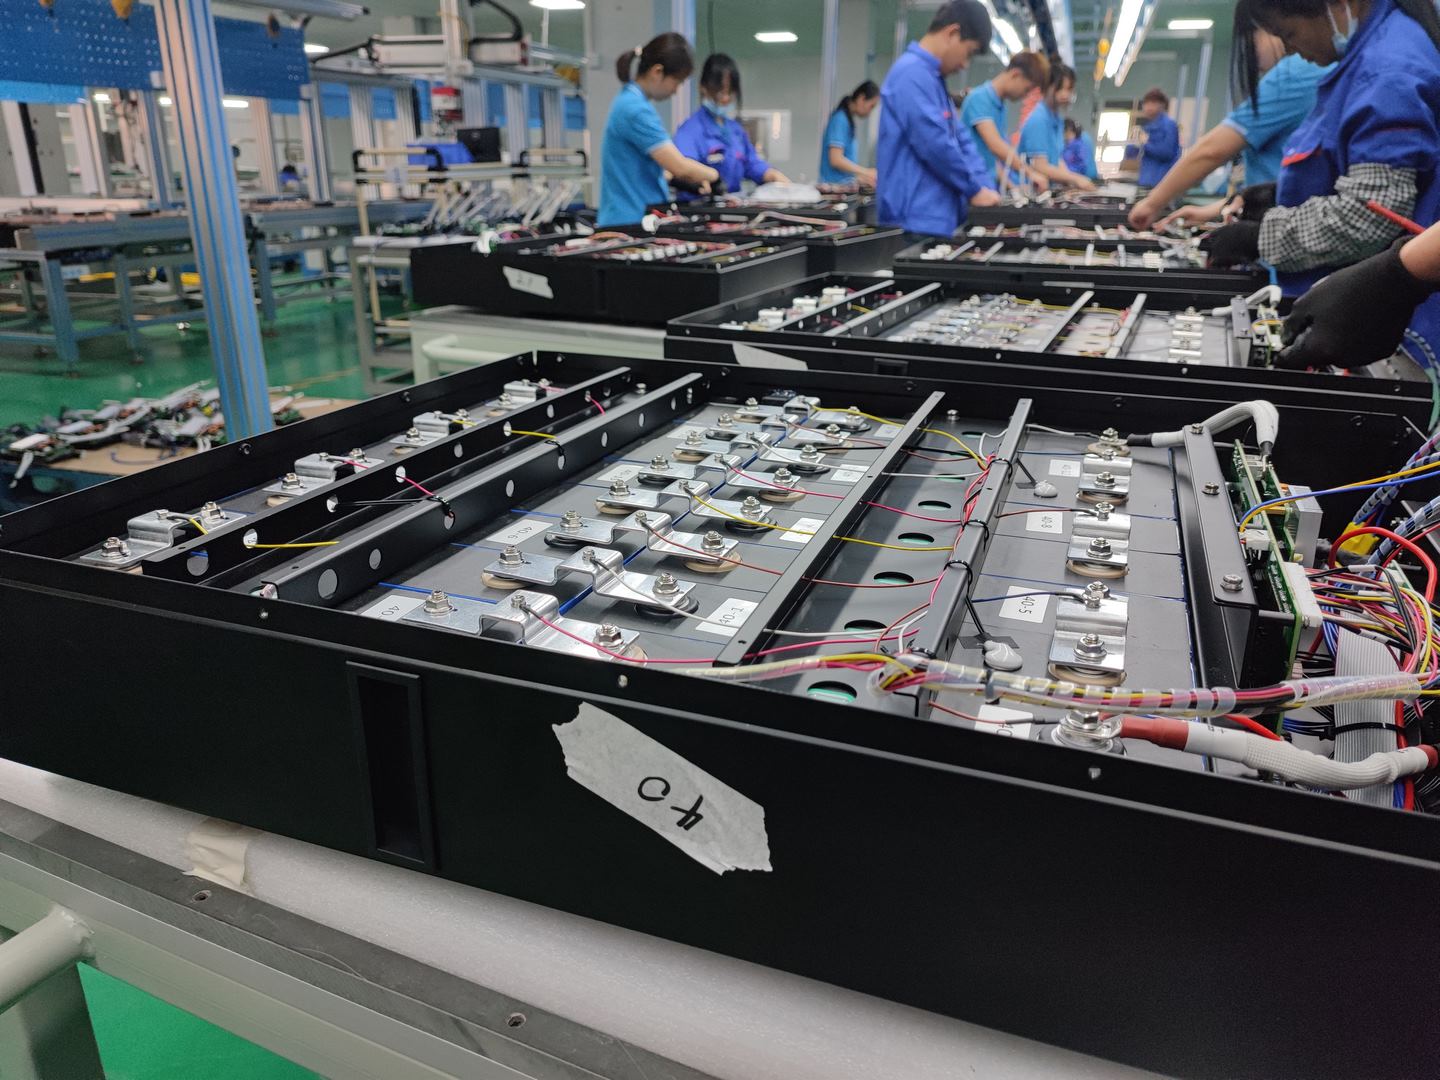
- Finally, connect all of the external wiring needed to complete installation such as balancing leads and other circuitry required for proper functioning.
Installing cells into a battery pack may seem intimidating at first but following these simple steps makes it easier than ever before! With just a few tools and some knowledge about electrical engineering principles, you can create a powerful source of stored energy quickly and safely. So don't delay - start building your own lithium-ion power source today!
Soldering Terminals To The Pack Shell
Now that the cells have been installed into the pack shell, it's time to solder terminals onto the battery pack. This process is crucial to ensuring that your lifepo4 battery can be charged and discharged with optimal performance.
Before soldering any terminals to the pack shell, start by cleaning each terminal thoroughly. Using a wire brush or sandpaper will help remove any dirt or corrosion which may interfere with your connection between the terminals and the pack shell. You'll also want to make sure all of your tools are in good condition before you begin - this includes making sure you have a quality soldering iron, flux, rosin-core solder, and heat shrink tubing ready for use.
After everything has been prepared correctly, you can begin soldering each terminal securely to its respective spot on the pack shell. Make sure to pay special attention as you go along; if not done properly, there’s a chance that some of your connections won't hold up over time - potentially leading to serious safety issues down the road. After all of your connections are finished, use heat shrink tubing around each joint again for additional protection against environmental elements such as moisture or dust particles getting inside.
With these steps complete, you should now have a fully assembled lifepo4 battery! All that remains is giving it one final check-over before being able to enjoy its power capabilities safely and confidently.
Testing And Balancing Of Cells
Testing and balancing of cells are integral steps in building a successful lifepo4 battery pack. It is essential to ensure that each cell within the battery pack has similar characteristics before installation.
To do this, various tests can be conducted:
| Test | Description |
|---|---|
| Cell Testing | Used to check for defects or inconsistencies between cells such as capacity and voltage. |
| Balancing Cells | Ensures that individual cells are properly balanced with one another. This helps prevent overcharging or undercharging which could lead to the insufficient power output from the battery pack. |
| Battery Testing | Measuring the overall performance of the battery pack by testing its charge/discharge rate, capacity, and efficiency. |
| Capacity Testing | Examining how much energy is stored within each cell by measuring their charge and discharge rates. This helps identify any weak links in the design of your battery pack. |
| Voltage Testing | Verifying that all cells have comparable voltages so they can work together efficiently without causing damage due to imbalances in current flow. This also ensures safety when charging or discharging the batteries. |
When conducting these tests it's important to keep an eye out for any irregularities or issues that could indicate problems with your build process, like shorts, bulging cases, or unusual temperature readings. Taking time to perform thorough testing will help avoid costly mistakes down the line! Properly testing and balancing your cells guarantees the long-term reliability of your custom-made lifepo4 battery packs and peace of mind knowing you've done everything possible to create a top-quality product.
Discharge Test For Maximum Capacity
Testing a lifepo4 battery pack is the key to ensuring maximum capacity. To do this, you must test each individual cell and measure its discharge rate under load. This helps determine if any cells are not performing as expected, which could be an indication of poor quality or defective parts.
The first step in testing a lifepo4 pack is to connect it to a suitable DC power source. Then set the current limit by adjusting the voltage on the controller according to your desired discharge rate. Once that's done, attach alligator clips from the power source to each terminal on the battery pack’s balance connector; this will ensure balanced charging and discharging of the cells within the pack.
Finally, observe how much energy each cell can store during a given time period at different discharge rates. Comparing these results with those of other packs can help you decide which one has more potential for providing reliable performance over time. With careful analysis and regular maintenance, you'll have control over your own lifepo4 battery pack!
Charging The Battery Pack Properly
Charging your LiFePO4 battery pack properly is essential to ensuring that it maintains its power and longevity. As the owner of a LiFePO4 battery pack, you have the responsibility to ensure that all charging procedures are followed in order to maintain performance and safety. First, when connecting the charger to the battery pack, be sure to match up the polarity correctly - this means that plus (+) should connect with plus (+), while minus (-) should connect with minus (-).
Secondly, only use chargers designed specifically for LifePO4 batteries; if not used correctly, other types of chargers can damage your cells.

Thirdly, never overcharge or leave your LiFePO4 battery unattended during charging set an alarm on your phone or watch so that you don’t forget about it! Finally, make sure you always disconnect from the mains once done charging as leaving it connected could cause overheating and potential fire hazards. Properly following these guidelines will help protect both yourself and your battery pack in the long run.
Maintenance Tips For Lifepo4 Batteries
As an electrical engineer or battery pack expert, we know that LiFePO4 batteries are the ideal choice for your project. With their high energy density and long lifespan, they provide a great solution to many power problems. However, as with all things in life, these batteries require proper care if you want to keep them running smoothly for years to come. Here are some easy maintenance tips for keeping your LiFePO4 batteries healthy:
- Keep Them Cool: Heat is one of the biggest enemies of any kind of battery. Make sure your LiFePO4 battery stays cool by storing it in a well-ventilated area away from direct sunlight and other sources of heat such as computers or water heaters.
- Avoid Overcharging: When charging your LiFePO4 battery make sure not to exceed its recommended charge limit or risk damaging the cells over time due to chemical reactions caused by overcharging. Investing in a quality charger can help avoid this issue altogether.
- Store Properly: Storing your LiFePO4 batteries properly will ensure they remain at peak performance even when not in use. For example, store the battery fully charged and disconnected it from anything else like chargers and external devices until ready for use again; this way you won't have to worry about discharging unexpectedly while stored away.
These three simple steps should be enough to guarantee years of reliable service from your LiFePO4 battery! Remember, regular maintenance is key when dealing with lifepo4 batteries; following these tips will go a long way towards ensuring your battery remains healthy throughout its lifetime so you can get the most out of it without having to replace it prematurely.
Storing Lifepo4 Batteries Safely
Storing LiFePO4 batteries safely is essential for preserving the lifespan of your battery pack. It's recommended to keep them in a cool, dry place and away from any heat sources such as direct sunlight. Optimal storage conditions will ensure that your batteries remain at their peak performance level when you need it most.
When storing LiFePO4 batteries, it’s important to be mindful of temperature fluctuations - too much or too little can cause damage over time. The ideal temperature range is between 0°C and 25°C (32-77F). If you're storing outside this range, take steps to regulate the batteries' environment. You should also avoid charging them below-freezing temperatures since this could lead to irreversible cell degradation.
It's also wise to have an appropriate charge level before placing them into long-term storage - about 50% capacity is ideal for LiFePO4 cells. This ensures optimal battery lifecycle management as well as prevents excessive self-discharge during idle periods. Here's a table outlining some key points on how to store LiFePO4 batteries safely:
| Point | Description | Example |
|---|---|---|
| Temperature | Keep within 32-77F/0-25℃ | Avoid extreme hot & cold environments |
| Charge Level | Store at 50% Capacity | |
| Heat Sources | Keep away from direct sunlight | |
| Charging Temperatures | Do not charge below-freezing temperatures |
Troubleshooting Guide
The road to building your own LiFePO4 battery pack is a rocky one - full of challenges that can leave even the most experienced electrician scratching their head. But with a few tips and tricks, you'll be able to troubleshoot any issues that arise along the way. Let's take a look at some common problems when it comes to LiFePO4 battery packs and how to tackle them.

When it comes to lifepo4 troubleshooting, one of the major components you’ll need to check is the shell of the pack. If there are signs of wear or damage, this could prevent the proper connection between cells and cause an imbalance in voltage across each cell. Make sure all connections are secure and inspect for any corrosion on contacts as well as cracks or dents in the casing itself.
The next part of lifepo4 troubleshooting involves checking out the BMS (Battery Management System) which will monitor cell voltages and current levels within a given range so they don't exceed safe limits. Ensure that all connections from BMS board pins are firmly attached to terminals. Also, make sure sensors connected to BMS are not broken or damaged in any way as this can result in incorrect readings leading to performance issues with your battery pack. Lastly, ensure correct wiring is used for both power cables as well as communication lines for accurate operation.
One final point worth mentioning during lifepo4 troubleshooting is cell balancing is an important step toward maintaining peak performance over time! This involves ensuring individual cell voltages remain equalized by transferring charge between cells if necessary based on set parameters such as minimum/maximum voltage thresholds per cell. Inspecting pack balance regularly should help keep your LiFePO4 battery performing optimally throughout its lifetime!
Recycling Used Batteries
ecycling used batteries can be an important part of building your own lifepo4 battery pack. When it comes to disposing of old, dead cells, recycling them is the best option for preserving the environment and saving money. With a few simple steps, you can safely recycle your used cells in order to reuse them or dispose of them properly.
First, you need to identify the type of cell that needs to be recycled. Some cells may have labeling on them indicating their chemistry and voltage; if not, then use a multimeter or other testing device to determine the characteristics of each cell. Once identified, group together any similar cells into one pile so they can be processed more efficiently later on.
Next, research local laws regarding battery disposal as well as reputable recycling centers near you that can responsibly process these materials and turn them into something new. You'll find that many cities offer free drop-off locations where you can take all types of batteries for proper disposal and even get reimbursed for doing so!

Finally, make sure that you are separating out any lithium-ion batteries from the rest before taking them offsite - this will help ensure safe handling during transport and processing at the facility.
By following these steps when dealing with old lifepo4 batteries, we can keep our communities clean while also reducing waste going into landfills. Reusing components whenever possible further reduces emissions associated with manufacturing processes. Together we can make a positive impact on our planet’s future by making responsible decisions today!
Conclusion
Making your own LiFePO4 battery pack is a great way to gain control of your power needs and make sure you always have access to the electricity you need. It’s not as daunting as it may seem, once you know what supplies you need and the steps to put them together correctly.
As long as you follow safety protocols when wiring the cells in series, store your batteries safely and properly maintain them then they can last for many years with proper care. And if something should go wrong, there are troubleshooting guides available that can help guide you through any issues that might arise.
So don’t be intimidated by making your own LiFePO4 battery pack with some patience and knowledge about how these packs work, anyone can build one successfully!
As a manufacturer specializing in the manufacture of battery packs, Harveypower is committed to the sustainable development of green energy and environmental protection, hoping that everyone can afford green energy and improve their lives.
